The current value of the Name property is Textbox2. This is not terribly descriptive. Delete this name and enter TxtLastName. Scroll down and locate the Text property. Delete the default text, and just leave it blank. Click on your first textbox to select it. Change the Name property from Textbox1 to TxtFirstName. What we've done is to give the two textboxes more descriptive names. This will help us to remember what is meant to go in them. Unfortunately, if you view your code (click the Form1.vb tab at the top, or press F7 on your keyboard), you'll see that the blue wiggly lines have returned:
TextBox1.Text = FullName
If you hold your cursor of the Textbox1, you'll see this:
TextBox1.Text = FullName
It's displaying this message because you changed the name of your Textbox1. You now no longer have a textbox with this name. In the code above, change Textbox1 into TxtFirstName and the wiggly lines will go away. (Change it in your Button1 code as well.) Your code should now read:
TxtFirstName.Text = FullName
Run your programme again. If you see any error messages, stop the programme and look for the wiggly lines in your code.
We'll now change our code slightly, and make use of the second textbox. You'll see how to get at the text that a user enters.
Locate these two lines of code
FirstName = "Hello"LastName = “World”
Change them to this
FirstName = TxtFirstName.TextLastName = TxtLastName.Text
Remember: the equals ( = ) sign assigns things: Whatever is on the right of the equals sign gets assigned to whatever is on the left. What we're doing now is assigning the text from the textboxes directly into the two variables.
Amend your code slightly so that the Whole Name is now displayed in a message box. Your code should now be this:
Dim FirstName As StringDim LastName As StringDim WholeName As String
FirstName = TxtFirstName.TextLastName = TxtLastName.Text
WholeName = FirstName & " " & LastName
MsgBox(WholeName)
Run your programme. Enter “Hello” in the first textbox, and “World” in the second textbox. Then click your "String Test" button. You should get this:
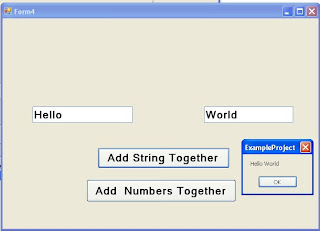
Before we changed the code, we were putting a person's name straight in to the variable
FirstName
FirstName = "Hello"
FirstName = "Hello"
But what we really want to do is get a person's name directly from the textbox. This will make life a whole lot easier for us. After all, not everybody is called Bill Gates! In the line FirstName = TxtFirstName.Text that is what we're doing - getting the name directly from the textbox. What we're saying to Visual Basic is this
Look for a Textbox that has the Name TxtFirstName
Locate the Text property of the Textbox that has the Name TxtFirstName
Read whatever this Text property is
Put this Text property into the variable FirstName
And that's all there is too reading values from a textbox - just access its Text property, and then pop it into a variable.
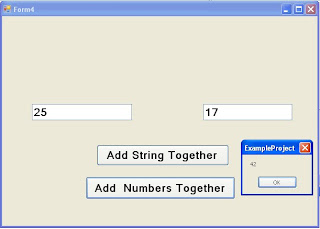
Total is now displayed in a message box. Your code should be this:
Dim FirstValue As Integer
Dim SecondValue As Integer
Dim Total As Integer
FirstValue = TxtFirstName.Text
SecondValue = TxtLastName.Text
Total = FirstValue + SecondValue
MsgBox(Total)
Exercise 1
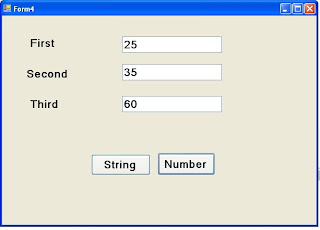
Add a Three Textbox to your form
Change its Name property to each TextBoxl
Add Three Labels to your form identifying each textbox
Add Two Buttons to your form and Change Text Property “Numbers” and “String”
Write code when the “Number” Button is Clicked, the Total of the Two values is Displayed in your Third TextBox.
Write code when the "String" button is clicked, the whole of the String name is displayed in your Third TextBox.
When you complete this exercise, your form should look like this one
